
Sometimes you want to isolate only the pixels in a raster that meet a condition — for example, keeping only healthy vegetation (NDVI > 0.4) and masking out everything else. This script does that in one step for any single-band raster.
What it does
The raster_mask_generator.py script creates a filtered copy of a raster where only pixels that pass a threshold test are kept. All other pixels are set to NoData, making them transparent in QGIS.
Two comparison modes:
greater_than— keeps pixels above the threshold (e.g. NDVI > 0.4 → healthy vegetation only)less_than— keeps pixels below the threshold (e.g. elevation < 850 m → low-lying areas only)
Output: {input_name}_mask_{gt|lt}{threshold}_nodata_{value|none}.tif saved in the same directory as the input, loaded into the QGIS project.
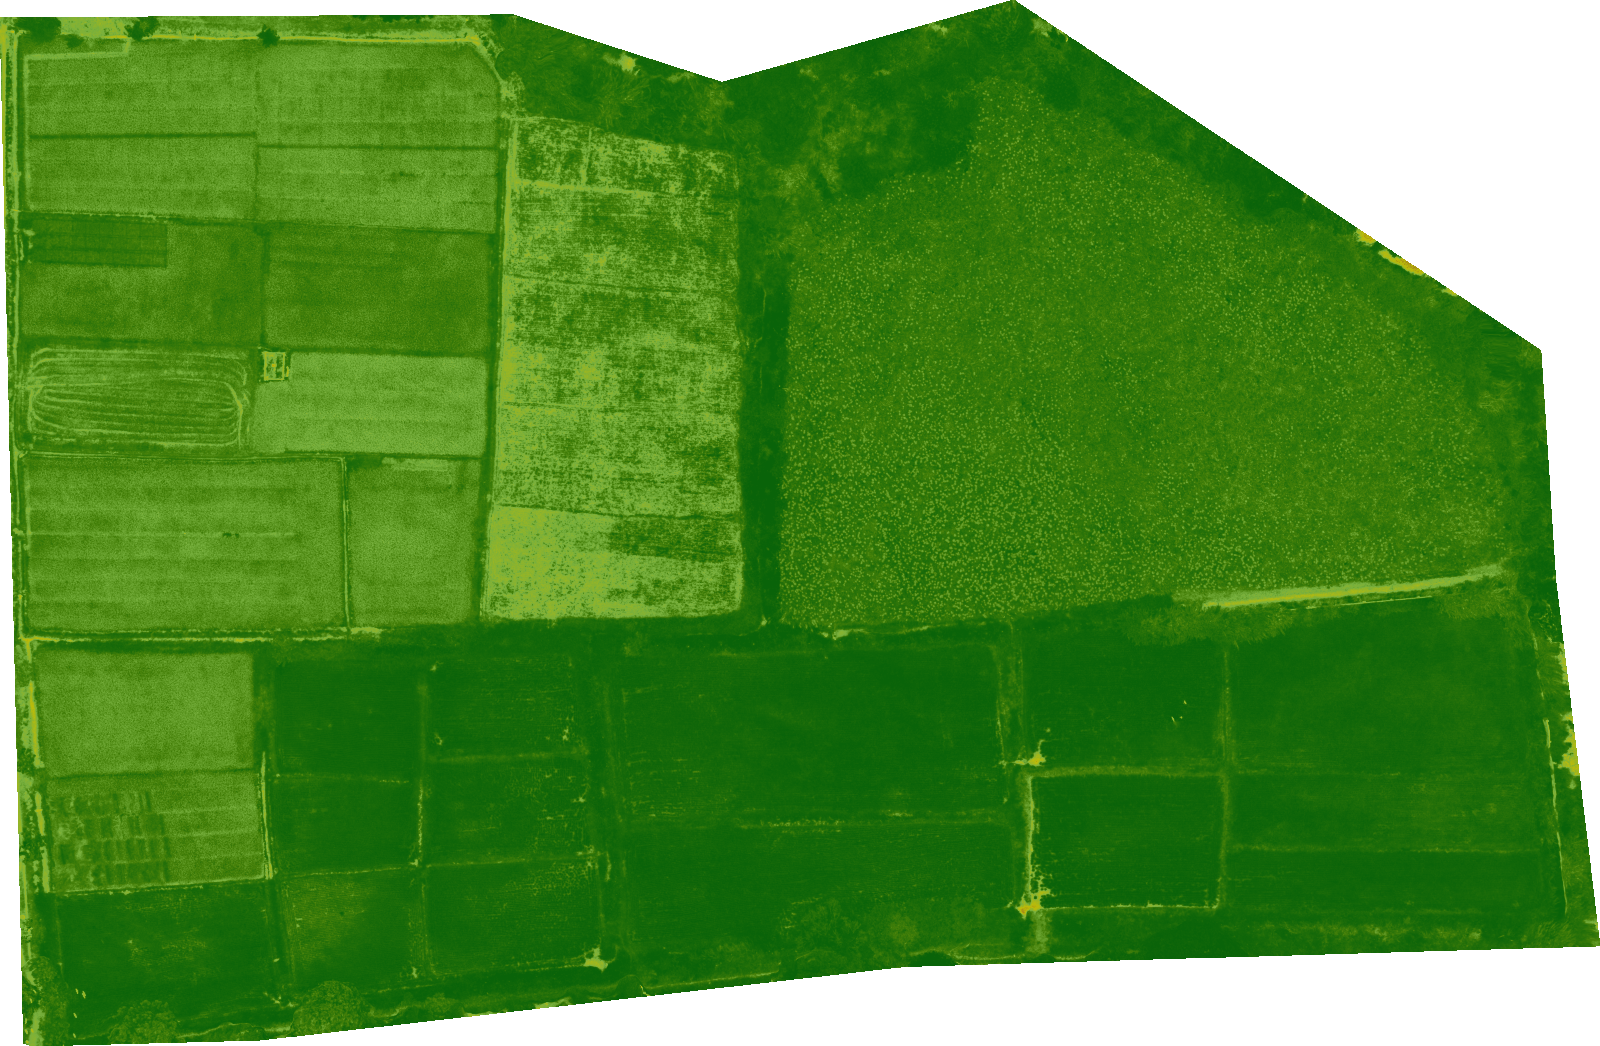
Before — the raw NDVI raster, every pixel coloured regardless of value:
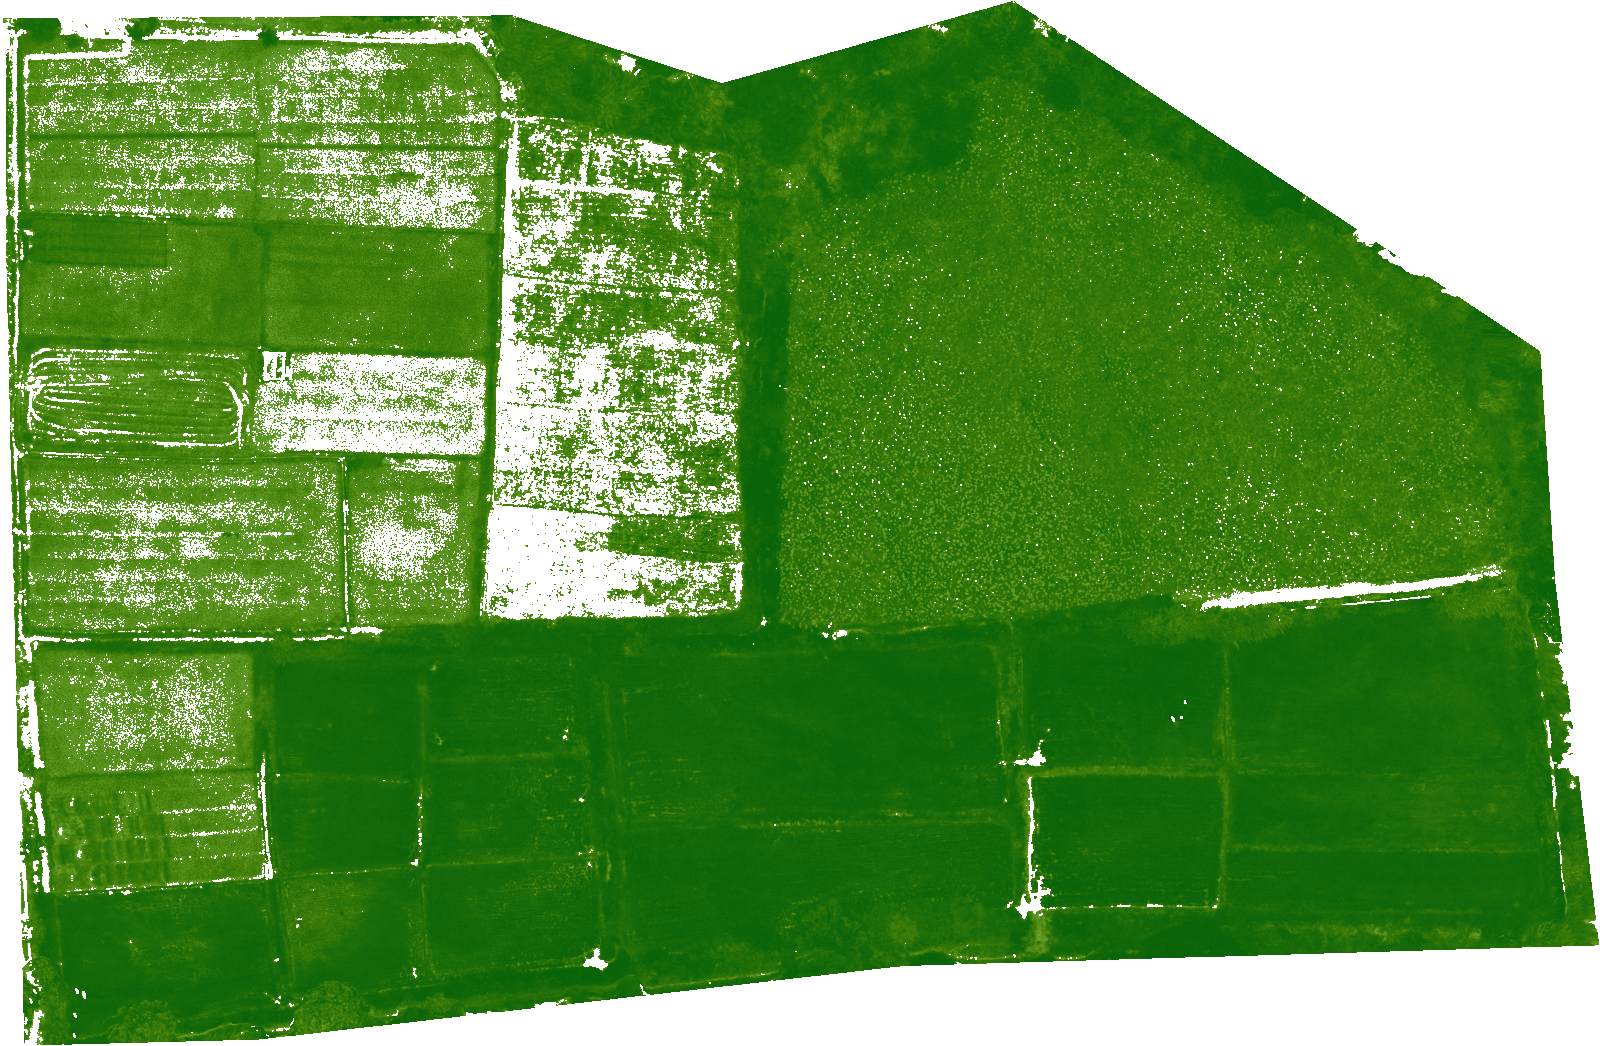
After — the same raster with threshold=0.4, comparison='greater_than' applied. Everything at or below 0.4 becomes transparent NoData, leaving only healthy vegetation:
What you need
- QGIS 3.28 or newer
- QGIS processing framework (bundled)
- The first checked raster layer in the Layers panel (any single-band raster)
- The
raster_mask_generator.pyscript from the Drone Mapping, Terrain & Multispectral Analysis QGIS Package
Before you start
The raw NDVI raster above didn’t need to be built by hand — it was generated automatically the moment the multispectral orthomosaic was loaded into QGIS, by an auto-running startup script (auto_generate_ndvi.py). See the startup scripts guide for how to set that automation up. If you’re masking a CHM instead of NDVI, generate it first with generate_chm.py.
Steps
- Load your raster (NDVI, elevation, CHM, or any single-band raster) into QGIS and check (tick) it in the Layers panel.
- Open Plugins → Python Console → Show Editor.
- Paste the script. At the bottom, set:
threshold— the cutoff value (e.g.0.4for NDVI)comparison—'greater_than'or'less_than'nodata— value for masked pixels (default:Nonefor NaN / transparent)
- Click Run.
Common use cases
| Use case | Raster | Threshold | Comparison |
|---|---|---|---|
| Isolate healthy vegetation | NDVI | 0.4 | greater_than |
| Show stressed or bare areas | NDVI | 0.2 | less_than |
| Map low-elevation zones | DTM/DEM | 850 | less_than |
| Show tall canopy only | CHM | 5 | greater_than |
Combining with other scripts
The output of this script can be used as an additional visual layer on top of your main analysis, or as a filtered input to further processing:
- Run
raster_mask_generator.pyon NDVI with threshold 0.4 to get a “healthy canopy” highlight layer - Overlay it on your classified CHM from
style_chm.pyto see where healthy vegetation and tall trees overlap - Or feed the masked raster straight into zonal_statistics.py against a sampling grid — this is a common real-world pairing: mask out bare soil/noise first, then average only the pixels that matter per grid cell
Get the script
raster_mask_generator.py is part of the Drone Mapping, Terrain & Multispectral Analysis QGIS Package — all 16 QGIS automation scripts at $99 USD.